


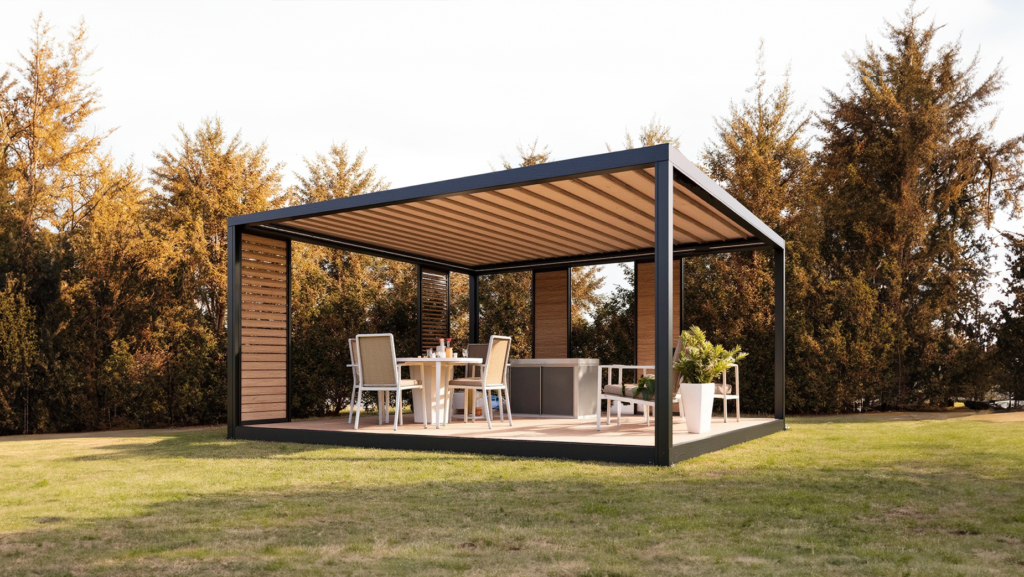
A well-planned pergola can turn an underused corner of your yard into a daily destination for coffee, meals, or quiet reading. The best results come from thinking beyond style photos and focusing on how shade, structure, and placement support the way you actually live. Whether you’re sketching ideas for a DIY build or evaluating what a professional could deliver, a few early decisions will shape comfort, safety, and long-term upkeep. This guide walks through the most important planning steps: purpose, site, size, materials, and permitting so you can create a pergola that looks right, feels good in all seasons, and ages well outdoors.
Clarify How You’ll Use the Space
Start by imagining the moments you want the pergola to host. A dining zone needs space for chairs to push back and for people to circle the table, while a lounge nook may prioritize deep seating and a view. If you’re picturing a grill or outdoor kitchen nearby, allow safe clearance from posts and overhead beams. Think about time of day, too. Morning coffee wants eastern shade and soft light; late-day gatherings benefit from western shade and airflow. List the must-haves: seating count, table size, heaters or a fan, and privacy, and let those guide dimensions and features.
Next, define how much sun you want to block and when. Open rafters with 2×2 slats might reduce midday sun by only a fraction, while adjustable louvers or a retractable canopy can go from dappled light to full shade. Look at your yard’s sun path in spring and summer rather than winter, and note nearby glare sources like light-colored siding, water, or hardscape. As you gather ideas, it helps to compare design options and construction approaches from trusted resources such as https://atlanticdreamscapes.com/pergola-builders/, then bring those notes back to your specific yard and goals.
Choose the Site, Size, and Orientation
Placement makes or breaks comfort. Use a compass app to find south and west; these sides deliver the harshest sun in most U.S. locations. Rotating the pergola so rafters run east–west can cast denser shade at midday, while north–south rafters may track shifting light more evenly. Check prevailing winds to avoid a wind tunnel between structures or tall fences. Make sure there’s headroom clear of eaves, gutters, and tree branches, and maintain safe distances from property lines, gas lines, septic components, and underground utilities; call 811 before any digging.
Right-size the footprint to allow circulation. For dining, plan roughly 3 feet of clearance behind each chair and at least a 36-inch walkway along one side. For deep lounge seating, add space for side tables and foot traffic. Height matters, too: 8 to 9 feet feels intimate; 10 to 11 feet runs airier and accommodates a ceiling fan or hanging plants. If you’re attaching to a house, confirm there’s proper structure for ledger connection; some siding types and window placements argue for a freestanding design a step or two away from the wall.
Materials and Roof Styles
Every material trades something. Wood (cedar, redwood, certain treated pines) offers warmth and easy customization, but it needs periodic sealing or staining. Aluminum resists rot and insects, holds finishes well, and keeps maintenance low, though it can feel cooler or more contemporary. Vinyl avoids painting but may limit custom detailing. Steel opens long spans and slim profiles but needs quality coatings and attention to corrosion, especially near salt air. For any material, specify corrosion-resistant fasteners and hardware; mixing metals can accelerate rust.
Roof style sets both look and function. Traditional open rafters with purlins create patterned light and mild shade. Deeper purlins, closer spacing, or angled slats increase shade. Retractable fabric canopies add flexibility but should be removed or secured before storms. Louvered systems allow on-the-fly control and can shed rain when closed; they require careful installation and solid anchoring. For rain protection without full enclosure, polycarbonate panels can let in light while diverting showers, but they add wind load; verify the frame is engineered for local conditions.
Comfort, Privacy, and Utilities
Comfort is a sum of small choices. In hot climates, consider a light-colored roof element to reflect heat, or integrate a fan to keep air moving. In colder regions, plan for low-angle sun with adjustable shade or removable panels so you can welcome warmth in shoulder seasons. Privacy screens or lattice on the sides can tame wind and block views without closing the space. Plantings of climbing vines, tall grasses, or espaliered trees soften edges, add seasonal interest, and filter light naturally. Just remember that heavy vines add weight and wind drag; design the frame accordingly.
Power and lighting expand how you use the pergola. Run conduit during construction so you can add a fan, outlets for heaters, and low-voltage or LED lighting. Position fixtures to avoid glare on faces and tabletops; indirect light along beams or posts creates evening comfort. If the pergola sits over pavers or a deck, plan drainage paths so rain doesn’t collect. Over turf or planting beds, use footers or piers that preserve soil drainage while keeping posts isolated from constant moisture. If you’re adding a fire feature nearby, follow manufacturer clearances and local regulations.
Permits, Structure, and When to DIY vs. Hire
Even simple pergolas are structures that must resist gravity, wind, and sometimes snow. Many municipalities require permits for posts set in the ground, attached pergolas, or any roofed structure; homeowners associations may have design rules or setback limits. Footings need to extend below frost depth in cold regions, and posts should be elevated on hardware to avoid rot. In high-wind or heavy-snow areas, ask about engineering requirements, uplift connections, and lateral bracing. Attaching to a house demands the right fasteners into solid framing, proper flashing, and compatible materials to prevent leaks.
DIY can be rewarding if you’re comfortable laying out square footings, cutting accurate joinery, and handling ladders or scaffolding safely. Pre-engineered kits simplify sourcing but still require careful anchoring and level assembly. Hiring a professional brings experience with local codes, utility checks, and structural details you may not want to learn the hard way. Ask for drawings that show post locations, beam sizing, hardware, and drainage notes; discuss storm prep for canopies or louvers; and clarify finishes and maintenance expectations up front so the pergola performs the way you expect over time.
A thoughtful pergola plan starts with purpose and ends with details that make the space easy to enjoy day after day. When you match site conditions to the right materials, shade controls, and structural choices and confirm permits and anchoring you get a structure that feels natural in your yard and holds up to weather. Take time to watch the sun in the spot you want to build, mock up the footprint and furniture with painter’s tape or cardboard, and sketch a few variations. Small decisions made now will repay you in comfort, safety, and years of relaxed time outside.
