


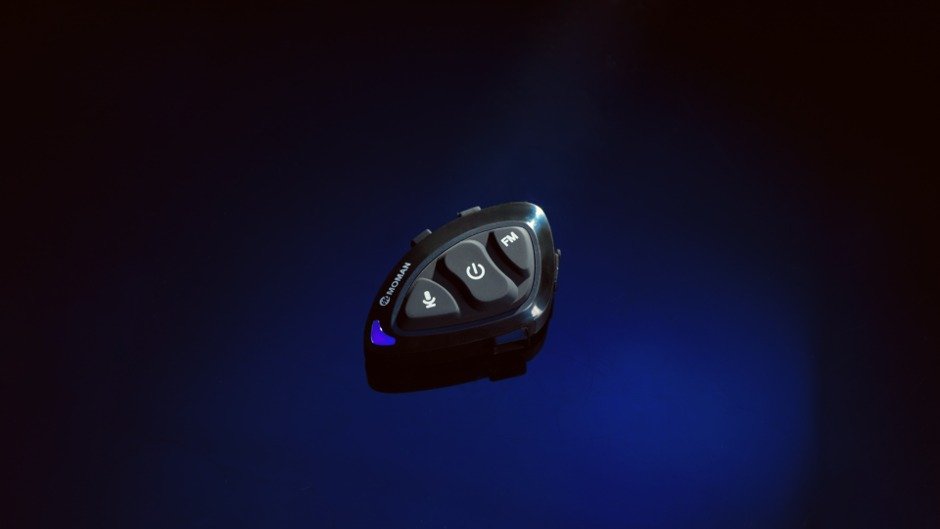
A wireless motorcycle headset can make riding more convenient. It can help you talk with a passenger, communicate with another rider, listen to navigation instructions, or enjoy music during a trip.
But before you can use it, the headset needs to be installed correctly. A poor installation can make the speakers uncomfortable, affect microphone performance, or make the headset difficult to control.
The good news is that most motorcycle headsets are not difficult to install. You usually need to position the speakers and microphone, attach the main unit, and connect the headset to your phone or another intercom. This guide explains the process step by step.
Source: Moman
What do you need before installation?
Before installing the wireless motorcycle headset, prepare everything you need. Take out the headset, speakers, microphone, mounting bracket, adhesive pads, cables, and other accessories included in the package.
You should also have your motorcycle helmet ready. It is easier to install the headset when the helmet is clean and dry.
Read the product instructions before starting. Different headsets may use different mounting methods. Some use a clamp, while others use adhesive mounts.
Check the helmet interior as well. Find the areas around your ears and mouth. These are usually the most important positions for the speakers and microphone.
Do not install anything before checking the fit. You want the headset to work well without making the helmet uncomfortable.
How to install a wireless motorcycle headset?
The installation process can vary between products, but the basic steps are similar. Work from the inside of the helmet to the outside. This makes it easier to position the audio components before attaching the main control unit.
Step 1: Clean the helmet
Start by cleaning the areas where you will install the helmet headset.
Remove dust, hair, and other dirt from the inside of the helmet. If you plan to use an adhesive mount, clean the outside area where the mount will be attached.
Let the surface dry completely before using adhesive.
This step may seem small, but it can affect how well the mount stays in place. A dirty or wet surface can make the adhesive weaker.
Do not use strong cleaning chemicals unless they are safe for your helmet material. Follow the helmet manufacturer’s care instructions when cleaning.
Step 2: Find the speaker positions
Next, find the correct positions for the speakers.
The speakers should sit close to your ears. Most helmets have recessed areas or removable padding that can make this easier.
Put the speakers in place temporarily and put the helmet on. Check whether the audio feels centered and comfortable.
If a speaker is too far from your ear, the sound may be quiet. If it presses directly against your ear, the helmet may become uncomfortable during a long ride.
Take a few minutes to find the best position before fixing the speakers permanently.
Step 3: Install the microphone
After positioning the speakers, install the microphone.
The microphone should be close enough to your mouth to pick up your voice clearly. However, it should not block your mouth or create pressure when you close the helmet.
The best position depends on the helmet design. A full-face helmet may need a boom microphone or a small microphone mounted near the mouth area. Other helmets may have different installation options.
Check the microphone cable before fixing it. Make sure it can reach the main unit without being stretched.
If the cable is too tight, it may become damaged or pull the microphone out of position.
Step 4: Route the cables
Now route the speaker and microphone cables inside the helmet.
Use the helmet’s existing padding to hold the cables in place when possible. Keep the cables away from areas where they could be pinched.
Do not leave long sections of cable loose inside the helmet. Loose cables can move around and become uncomfortable.
At the same time, avoid bending the cables too sharply. A gentle route can help reduce stress on the connections.
Take your time with this step. Good cable management can make the final installation look cleaner and feel more comfortable.
Step 5: Attach the main unit
Once the internal components are in position, attach the main communication unit.
Many headsets use a clamp that slides between the helmet shell and the interior padding. Other models use an adhesive mount.
Choose a position that is easy to reach while wearing gloves. The buttons should be accessible without forcing you to move your hand too far.
The unit should also be secure. Try moving it gently after installation. If it feels loose, check the mounting method and adjust it before riding.
A motorcycle helmet wireless headset should stay firmly attached even when the rider moves their head.
Step 6: Connect the speakers and microphone
Connect the speaker and microphone cables to the main unit.
Make sure each connector is fully inserted. A loose connection can cause one speaker or the microphone to stop working.
Do not force the connectors. If a plug does not fit easily, check its orientation and make sure it is connected to the correct port.
Once everything is connected, turn on the headset and test the audio.
You can now check whether both speakers work and whether the microphone picks up your voice.
Step 7: Pair the headset with your phone
If your headset supports Bluetooth, the next step is to connect it to your phone.
Turn on Bluetooth on your phone and put the headset into pairing mode. Find the headset in the available Bluetooth devices list and select it.
Once the connection is complete, test a few functions.
Play some audio to check the speakers. You can also make a test call to check the microphone.
A wireless Bluetooth headsets for motorcycles setup may also support other Bluetooth devices, depending on the model.
Follow the headset instructions if the pairing process is different from the standard Bluetooth process.
Step 8: Test the headset inside the helmet
Do a complete test before going for a ride.
Put on the helmet and check the speaker position. Make sure nothing presses against your ears or head.
Then speak into the microphone and check the voice quality. If possible, ask another person to listen to your voice during a test call or intercom connection.
Also check the buttons. Make sure you can find the volume and communication controls while wearing gloves.
If something feels uncomfortable, remove the helmet and adjust the headset. Do not wait until you are on the road to fix the problem.
Step 9: Test it during a short ride
After the installation works indoors, try a short ride.
Start somewhere familiar and safe. Test the headset at different speeds and listen for changes in audio quality.
Wind noise can become much stronger when the motorcycle is moving. If the other person cannot hear you clearly, check the microphone position.
You should also make sure the headset remains securely attached.
A short test ride can help you find small installation problems before a longer trip.
What should you avoid during installation?
Do not place the speakers too far from your ears. This can reduce audio volume and clarity.
Do not put the microphone where it blocks your mouth or creates pressure.
Avoid leaving cables loose inside the helmet. They can become uncomfortable and may interfere with the helmet padding.
You should also avoid covering important ventilation areas. The helmet must continue to work as designed.
Finally, do not modify the helmet shell just to install a headset. Drilling or cutting the helmet can affect its structure and safety performance.
If your helmet and headset are not compatible, look for a different mounting method instead.
Conclusion
Installing a wireless motorcycle headset is usually a simple process when you take it one step at a time.
Start by cleaning the helmet and finding the right positions for the speakers and microphone. Then route the cables, attach the main unit, and connect all the components. After installation, pair the headset with your phone if needed and test everything before riding.
A comfortable helmet headset should stay secure without creating pressure or blocking important helmet features. Take a short test ride before using it on a long trip.
A careful installation can give you clearer audio, better microphone performance, and a more comfortable riding experience.
